Finding Exclusions
The Finding Exclusions feature lets you filter out findings that do not apply to your project. Once you exclude a finding, similar findings are automatically filtered out from all future scans of the same repository.
Exclusions affect only the dashboard. The generated PDF report still shows every finding.
When to exclude a finding
Three common reasons.
- False positive. The finding is technically incorrect for your specific implementation.
- By design. The behaviour flagged is intentional and part of your contract's design.
- Not relevant. The finding does not apply to your specific context or use case.
Exclusions hide similar findings across all future scans of the repository, so save them for cases you have confirmed do not apply. When you are unsure, use thumbs down instead. It tells us the finding is wrong without suppressing it on future runs.
How to exclude a finding
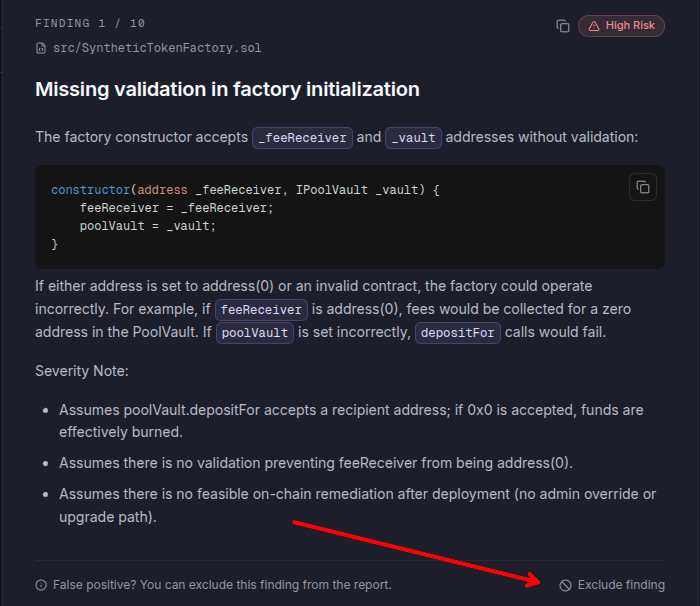
Open the Findings tab in your scan results.
- Locate the finding you want to exclude.
- Click the Exclude finding? link on the right side of the finding.
- In the modal that appears, pick the reason that fits (false positive, by design, or not relevant).
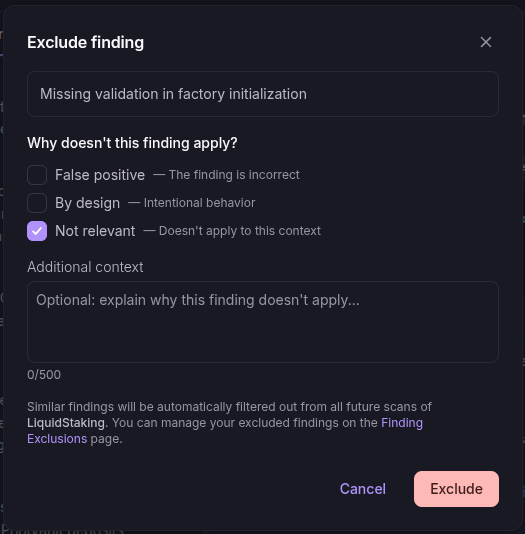
- Click Exclude to confirm.
Once excluded, similar findings are filtered out from all future scans of that repository.
Some findings may still appear if we detect they could become relevant again due to changes in your codebase. The exclusion is not absolute.
Providing feedback without excluding
If you want to mark a finding as incorrect without filtering similar ones from future scans, use the thumbs down button. This sends feedback to improve AuditAgent's detection accuracy without affecting future scan results.
- Thumbs up marks the finding as helpful.
- Thumbs down marks the finding as incorrect (feedback only).
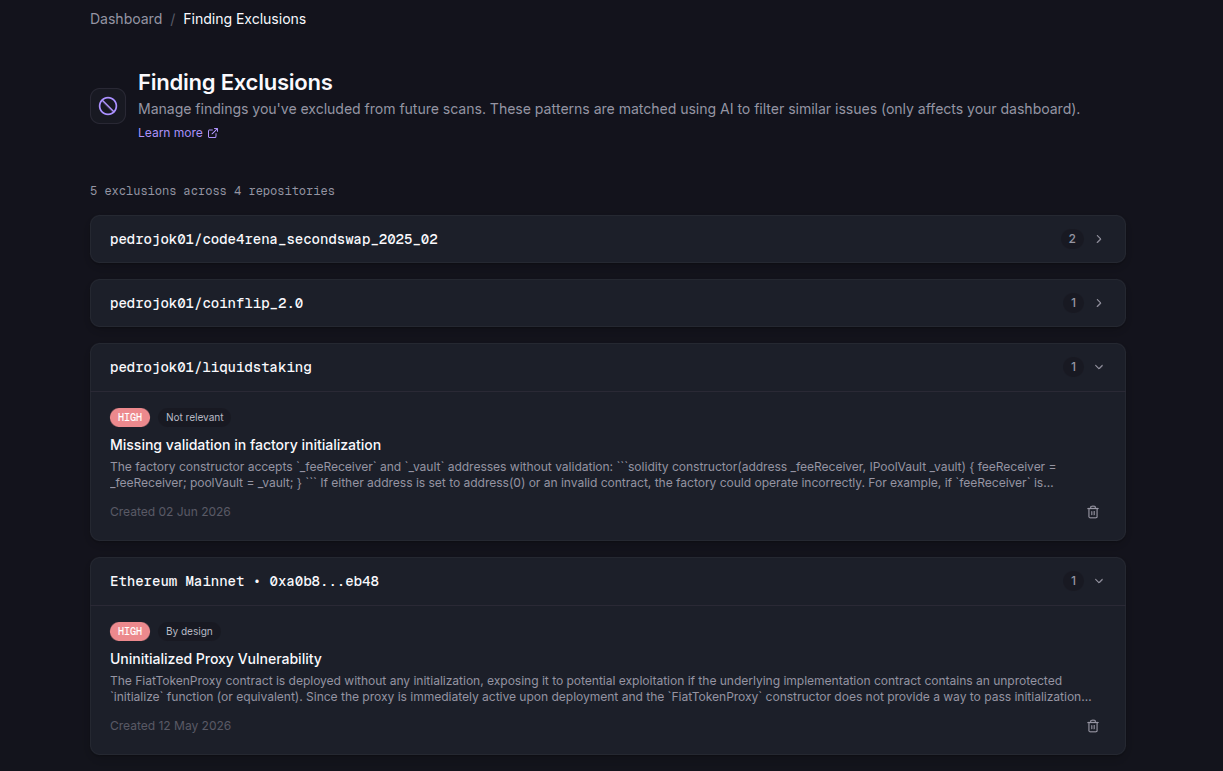
Managing your exclusions
You can view and manage all exclusions from your profile.
- Go to Profile settings.
- Open the Finding Exclusions tab under the "Other" section.
- You will see all your excluded findings grouped by repository.
Removing an exclusion
To bring a previously excluded finding back, go to Profile → Finding Exclusions, find the exclusion, and click Delete. Similar findings will appear again in future scans of that repository.
- Be specific. Only exclude findings you are certain do not apply to your project.
- Document your reasoning by selecting the most accurate reason. The signal helps us improve detection.
- Review periodically. Check your exclusions list occasionally to make sure they are still relevant.
If you have Persistent Memory enabled for a project, your excluded findings are also tracked in the memory's Excluded Findings category, keeping future scans consistent automatically.